How to fix the ‘Required Dependencies’ error in VALORANT
Table of Contents
Each update or a new title goes through long stages of quality assurance. This helps when it comes to eliminating all the bugs before the release, but new errors can always appear during the shipment.
Considering the number of unique gaming rigs around the world, it’s practically impossible for Riot Games to test every possible scenario without releasing anything, creating situations where the developer has to improvise on the spot. The Required Dependencies error in VALORANT is one of those errors that seems to rise from the dead whenever there’s a new VALORANT patch.
Even if you don’t receive any errors while installing a patch, you can still get greeted with the “We couldn’t install a required dependency” error in your launcher. Though the error recommends a few fixes right off the bat, they may not always work. It’s clear that the error is mostly caused by a hiccup during the installation process, so you’ll need to make sure there’s nothing on your computer that may be preventing the Riot Games Launcher from doing its magic.
See Valorant on AmazonHere’s how you can fix the Required Dependencies error in VALORANT.
Restart your computer or wait the error out
Restarting your computer and waiting out the error are two tips the pop-up you see will tell you. They may sound elementary, but these two fixes are potentially the most effective ones that’ll resolve the error for most players.
If anything was blocking the launcher from downloading the files correctly, chances are it won’t be there when you restart your computer. Make sure VALORANT is the first program you launch after restarting your PC, however, since running anything else before will defeat the purpose of restarting your PC.
In most recent cases, though, the error was mostly caused by server-related problems, meaning players had no option but to wait for an additional fix to roll out. You can check out community hubs like Reddit to see if there other players posting about the error.
While Riot doesn’t acknowledge most post-patch errors, the fixes usually roll out within a couple of hours, meaning you won’t need to wait that long.
Uninstall Vanguard
Past occurrences of the Required Dependencies error usually had something to do with Vanguard files. Deleting Vanguard entirely from your computer will cause the launcher to reinstall it.
You can uninstall Vanguard by right-clicking its tray icon and selecting Uninstall. If you can’t see the tray icon, you’ll need to uninstall it from the Add/Remove Programs section of your PC’s Control Panel.
- Open the Start menu and type in “Control Panel.”
- Click on Programs and Features.
- Search for Riot Vanguard and uninstall it.
- Restart your computer after deleting Vanguard.
- Run VALORANT as an administrator.
- VALORANT’s launcher should start downloading Vanguard.
Ensure your operating system and graphics drivers are updated


Game developers focus on optimizing their games for the latest available software. If you haven’t been up-to-date with recent operating system updates, there’s a chance the error may be appearing due to an already fixed bug.
Updating your system will make sure everything is in top shape and eliminate the odds of receiving the Required Dependencies error due to a software glitch.
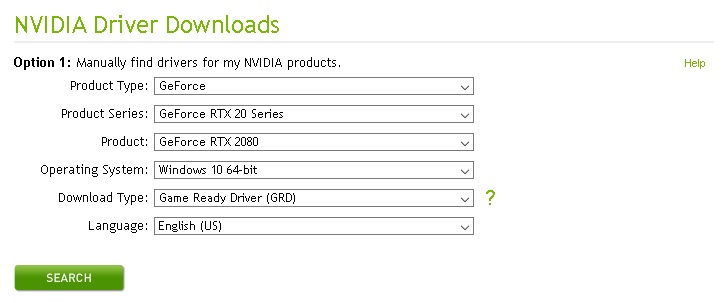
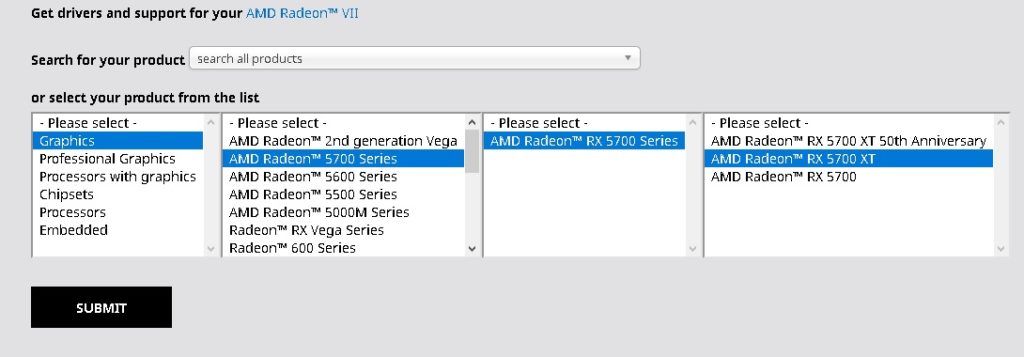
Though updating your graphics card shouldn’t have anything to do with VALORANT installing its files correctly, it’s also advised to update your graphics drivers as well to cover all bases.
Disable your antivirus and exclude VALORANT in Windows Firewall
Antivirus software mean well. They can be over-defensive sometimes, however, trying to block games files during the downloading process due to false positives. Even if VALORANT’s launcher continues with the rest of the update, that one file that was blocked by your antivirus software can cause the Required Dependencies error.
Turn off your software before updating VALORANT. While Windows Firewall doesn’t interfere with games as much as it did back in the day, it’ll still be a decent idea to set VALORANT as an exclusion on the Windows Firewall.
- Open up your Windows search bar or Start menu, and type in Windows Defender Firewall.
- Click on the first item that comes up and choose Allow a program through Windows Firewall.
- Choose Change Settings.
- If you see any VALORANT or Riot Games entries, remove them before proceeding.
- Select Allow another app and locate the installation folder for VALORANT.exe and click on OK.
- VALORANT.exe is usually located at “C:\Riot Games\VALORANT\live\.”
- Check all the boxes for VALORANT on the firewall exceptions and click OK.
- Repeat these steps for “vgc.exe” and “RiotClientServices.exe.”
- “Vgc.exe” can be found at “C:\Program Files\Riot Vanguard.”
- “RiotClientsServices.exe” can be found at “C:\Riot Games\Riot Client.”
Run VALORANT as an administrator
Running VALORANT as an administrator will mostly help players who technically operate on their machines as guests. This mostly applies to computers issued by schools and workplaces. If guest users don’t have any installing rights, VALORANT’s launcher might struggle to download updates.
You can run VALORANT as an administrator by right-clicking on it and selecting Run as Administrator every time you launch it.
Alternatively, you can also right-click on VALORANT and navigate to Properties. From there:
- Switch over to the Compatibility tab.
- Look for the Privilege level option and check the box next to the “Run this program as an administrator” option.
Following the second method will let your launch VALORANT as an administrator at all times. This setting may reset itself after major patches, meaning you’ll need to follow the same procedure if you notice it missing.
ncG1vNJzZmicn6mytLzOq6usZpOkunDCwKWmq5meqXyvsdasZqGnp2LBsHnFoq9mrJiaerOx0K6gq52UYrGmvMSnm56mk56ytHnEq6moql2eu27CwKWmq5meqQ%3D%3D